Essential Rock Climbing Kit
By Stuart McAleese IFMGA Mountain Guide
Though it takes time to acquire rock-climbing gear as it can be expensive and needs a bit of research, most of the gear will last you many years of climbing adventures. Take your time, prioritising the essentials and adding to this gradually to complete your climbing rack and ropes. With time you’ll also learn what works best for you and which kit you prefer, building up your climbing equipment wish list. This process never really stops, as sometimes you’ll need to replace equipment if it gets lost or damaged, or if you feel after while some kit needs an upgrade as equipment technology advances and new designs enter the climbing world. Lots has changed in the last 20 years and there are far more climbing brands producing good quality gear to choose from at a range of price points.
Where to start?
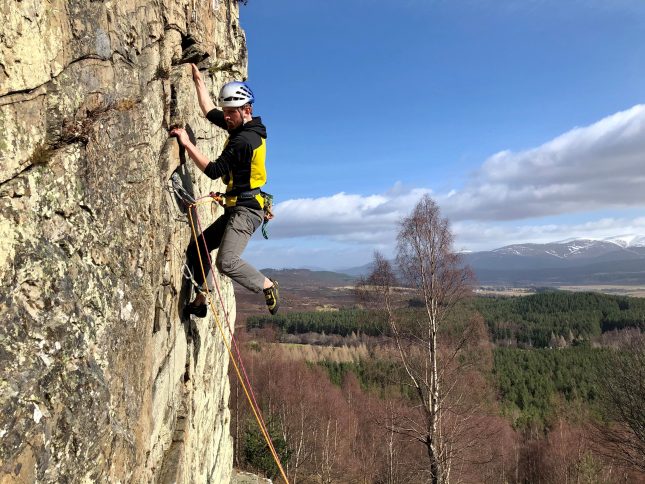
Start with the essential personal items such as rock shoes, helmet, and harness, aiming for models you like that are intended for all round use. It’s important that you try these on as designs and models vary slightly; if it’s comfortable and feels good, you’re far more likely to operate better and enjoy your climbing. Search for reliable local climbing shops, and if there are none nearby your nearest climbing wall might have shops onsite. Climbing shop staff tend to be experienced climbers and mountaineers who are there to help and give advice on selecting climbing gear. Word of mouth from friends or seeing equipment used and hearing good feedback is another way of selecting the brand or model for you.
It’s important that your climbing equipment is all rated and has been through recognised tests and certificates. I would only recommend buying climbing equipment that is certified CE and/or UIAA, identifiable by their respective logos, which will be seen on most reliable climbing manufacturers’ equipment displayed alongside other information like max loads in KN and guidelines for proper use.
Look to reputable climbing equipment manufactures and brands at first; there are only a handful available and they’re very reliable, with dedicated histories of producing equipment for climbers throughout the world.
Where to look?
You can also try searching online for climbing equipment shops – you gain the benefit of being able to research your options more, but lose the chance to try things on before buying them and to talk to staff. Even though it may be tempting at the start of your journey when gear can be dauntingly expensive, I would avoid buying equipment that is surprisingly cheap as this might turn out to be uncertified or inappropriate for use. This is becoming less likely nowadays, as many good reliable climbing shops have strong online presence and profile, making it easier for you to search and find good quality climbing equipment. It’s also helpful to note that the most expensive doesn’t always mean the best, with higher prices tending to reflect the very specific application of a particular item.
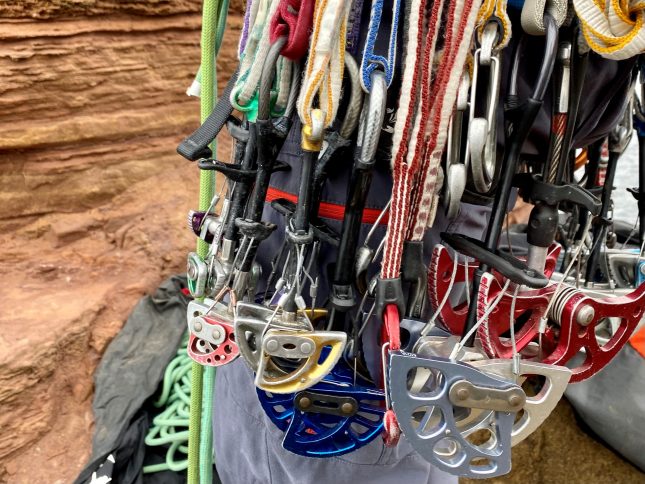
A start up climbing rack and ropes:
Beyond your personal kit, you will soon be looking for your own rope and small climbing rack. Build up slowly and remember it is normal to combine equipment with your climbing partner on the day to supplement your rack. Starting out you need the basics and a rope too; lots depends on the style of climbing you are initially planning and where, as different rock types can influence what is required. You may find ‘bundles’ and ‘protection packs’ of gear to help get you started which can be a cheaper way of buying the basics in a set. When looking for your first single rope, ensure it is thick enough (approx. 10mm – 10.5mm) to be durable and comfortable enough to hold effectively in a braking or lowering situation. This will also highlight the importance of having a belay plate that is compatible and will provide good effective braking with your rope you are using.
While starting out climbing at single pitch crags and practicing making belays with a view to introductory lead climbs, you may consider the following initial rack and rope. The following rack attempts to supply you with the range and options to create belays and place protection in a variety of crack/feature sizes. Ultimately, we must be resourceful and creative as there is a limit to what we can carry as climbers. Take time to learn how to place and judge the quality of each item of climbing protection; this can be done safely on small crags, boulders, at the base of the climbs or, if easily accessible, the top of the crag too.
50m single climbing rope – aim for around 10mm-10.5mm – All-purpose rope with good handling (in a braking/lowering situation) and able to use comfortably
Belay plate and Karabiner
Set of wires (Wallnuts) 1-10
Selection of cams sizes 0 to 5 (DMM Dragon sizes)
8 Quickdraws of varying length
3 larger Torque Nuts/Rockcentrics
4x 120cm Sling
6x Screwgate Karabiners
Karabiner and 2 x prusik cord
1 x Nut Key (used to help retrieve stuck kit)
Chalk bag
This outlines a basic starting out rack, which may take time to build up; items such as the cams will take time to collect as they are expensive, so depending on their importance (rock type dependant) you may just start out with 3 cams. You also will quickly prefer more wires too (wallnuts) especially for multi pitch climbing where you are building belays, where it would be normal to have a double set of wires 1-10.
Maintaining, storing and replacing:
It’s important to monitor the condition of your climbing equipment, which can be made easier by routinely cleaning and checking it. There are a few environments that will demand greater cleaning and maintenance, places such as climbing by the sea. Wash/rinse your climbing rack and ropes in normal water after contact with sea water or regular climbing on sea cliffs. Keep your rack and ropes clean and monitor the cams too, as these may need a clean and lube after some time. Follow the equipment guidance and advice, and store in a cool, dry place away from any direct sunlight.
Most climbing equipment is very durable and will last a long time, but it’s worth being aware that some specialist climbing equipment nowadays is becoming lighter and consequently less durable. Additionally, equipment designs and technology are always improving, providing good opportunities to upgrade some of your kit once you’re ready to.
Finding out more:
There is little substitute for going climbing and placing gear, as this enables you to see gear opportunities and builds your creativity and judgement of gear placements. Doing easier climbs that are well within your climbing grade allows you greater capacity to focus on the technical aspects such as ropework and gear placements and building anchors. If getting out climbing is less accessible to you, there are still lots of ways you can practice and learn about using your climbing equipment such as researching online, reading reference books or heading to your local climbing wall. Enjoy doing your research and continue learning from role models, experienced climbing friends and family or professional Instructors and Mountain Guides. It’s always good to share and learn, so don’t be afraid to ask advice and enjoy finding out more, rock climbing and time using your climbing equipment.
About Stuart
Originally from Northern Cumbria I started out hill walking in the Lake District when I was at school. I soon become interested in rock climbing and mountaineering, and was lucky enough to work and climb with Mountain Guides during my first job leaving school. Since then I’ve been working full time in the mountains for around 20 years.
At the same time as working, I enjoy climbing in my free time and have been lucky enough to go on many expeditions around the world, climbing new mountains, first ascents and tough remote summits. Places such as Patagonia, Alaska, Himalaya, Peru, Baffin Island, Yosemite and China. In 2004 I was nominated for the prestigious Piolet d’Or in Grenoble, France, for a 1st ascent of the ‘Supa Dupa Couloir’ in Alaska.
I love my job as a Mountain Guide, teaching and exploring big mountains in all weather all year round. I joined the Glenmore Lodge team in 2019 and head up the Summer Alpine programme.